Inventory adjustments
In any warehouse management system, the recorded inventory counts in the database might not always match the actual inventory counts in the warehouse. Discrepancy between counts can be due to damage, human error, theft, or other factors. As such, inventory adjustments must be made to reconcile the differences, and ensure that the recorded counts in the database match the actual counts in the warehouse.
Inventory Adjustments page
To view the Inventory Adjustments page, navigate to Inventory app ‣ Operations ‣ Adjustments ‣ Physical Inventory.

In order to import quantity with categories and variants, the Import Template for Inventory Adjustment must be downloaded. Once downloaded, the template can be adjusted and customized, and then uploaded back into the Edgerp database.
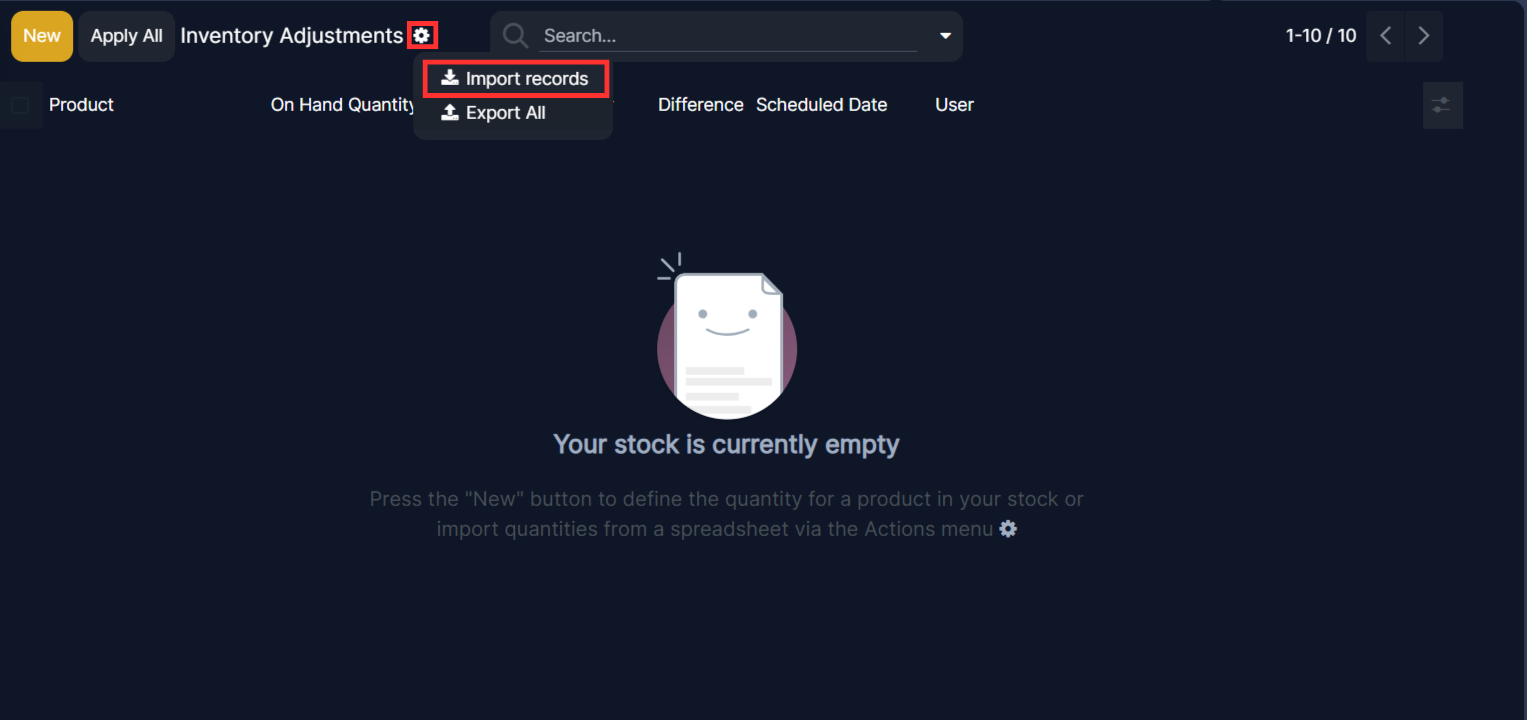
To download the necessary import template, navigate to Inventory app ‣ Operations ‣ Adjustments ‣ Physical Inventory page, click the ⚙️ (gear) icon in the upper-left corner. Doing so reveals a drop-down menu.
From this drop-down menu, select the Import records option.
Selecting Import records reveals a separate page with a link to download the Import Template for Inventory Adjustment Click that link to download the template.
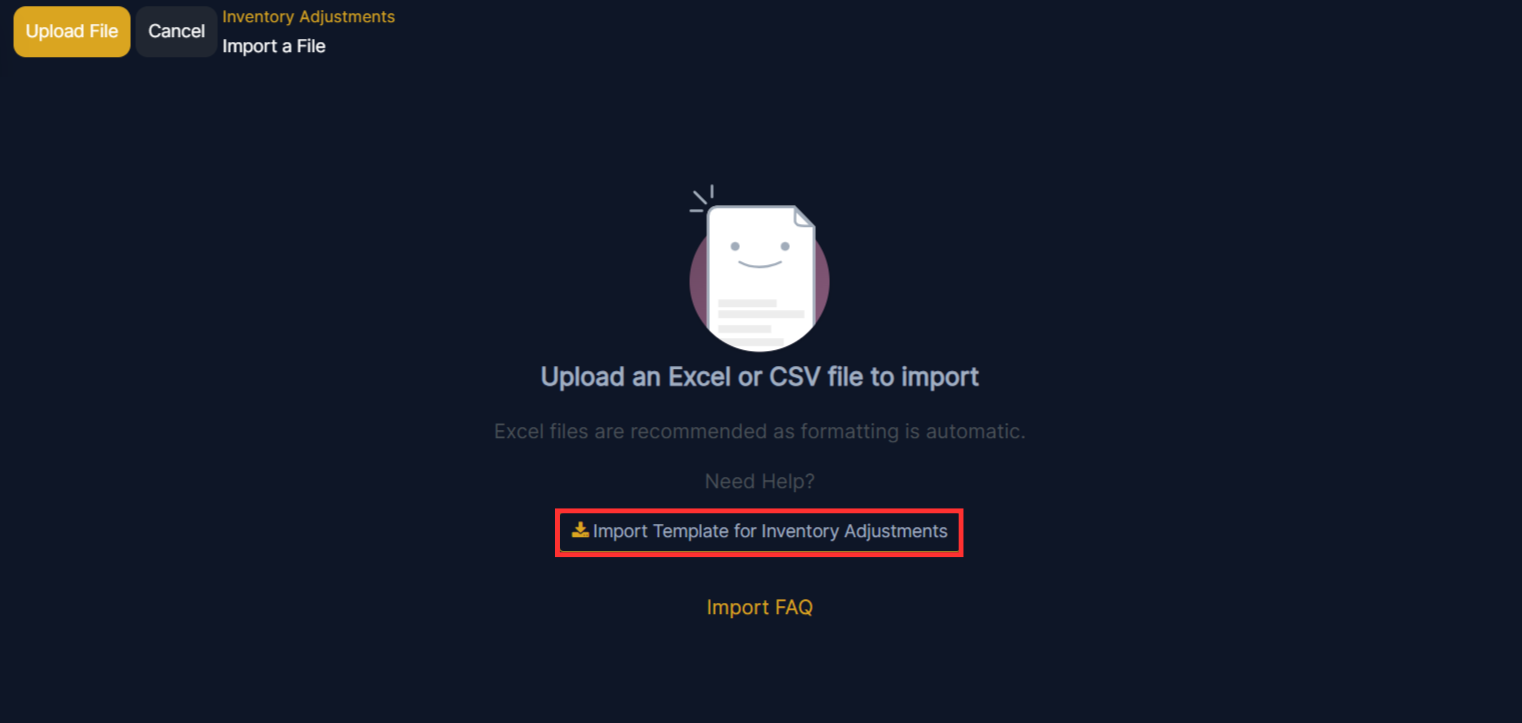
Once the template download is complete, open the spreadsheet file to customize it.
Customize product import template
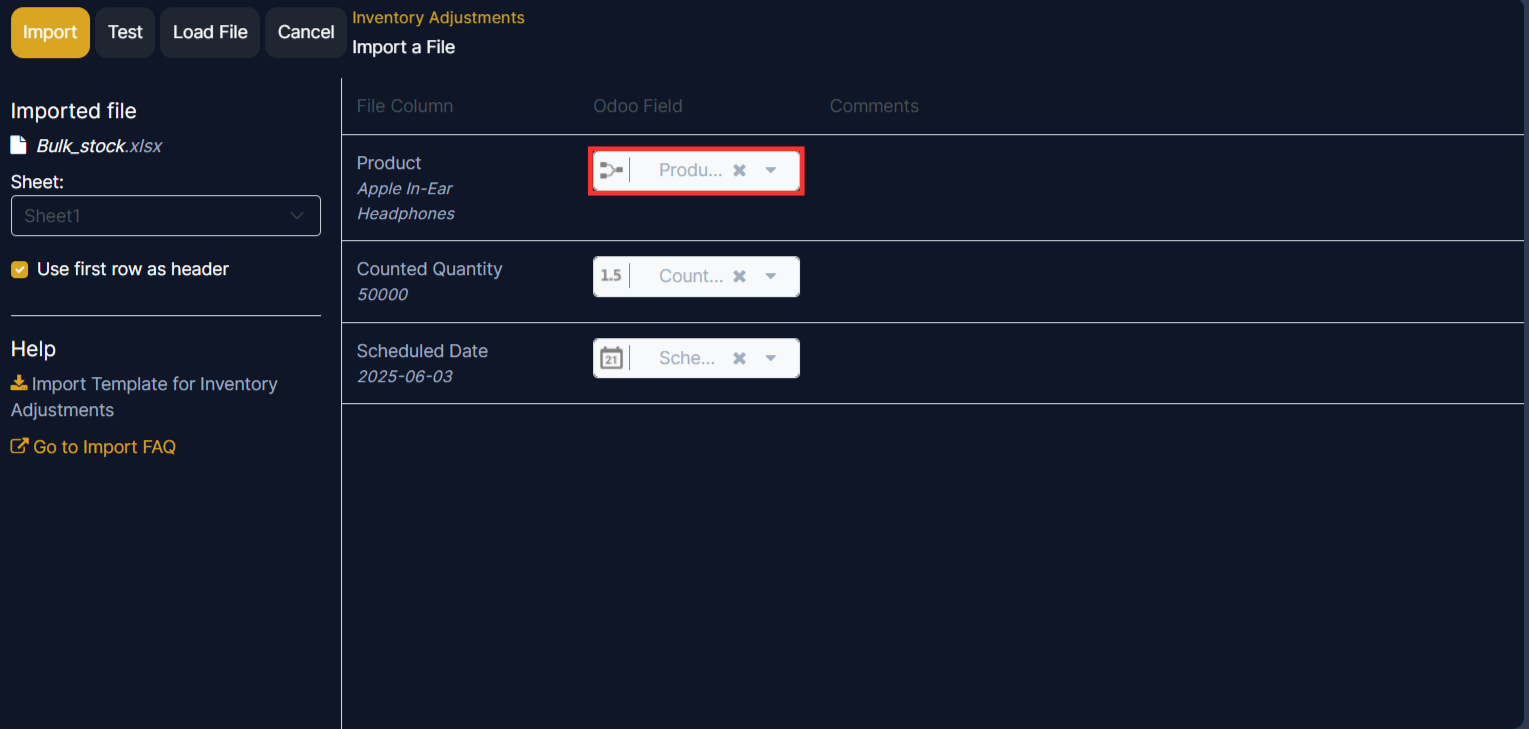
During the import process of the completed template, Edgerp reveals a page showcasing all the elements of the newly-configured inventory adjustment template spreadsheet, separated by File Column, Edgerp Field, and Comments.
To manually match a column name with a field in Edgerp, click the Edgerp Field drop-down menu next to the File Column that needs a manual adjustment, and select the appropriate field from that drop-down menu.
Import Inventory Adjustment template spreadsheet
After customizing the inventory adjustment template spreadsheet, return to the Edgerp inventory import page, where the template download link is found, and click the Upload File button in the upper-left corner.
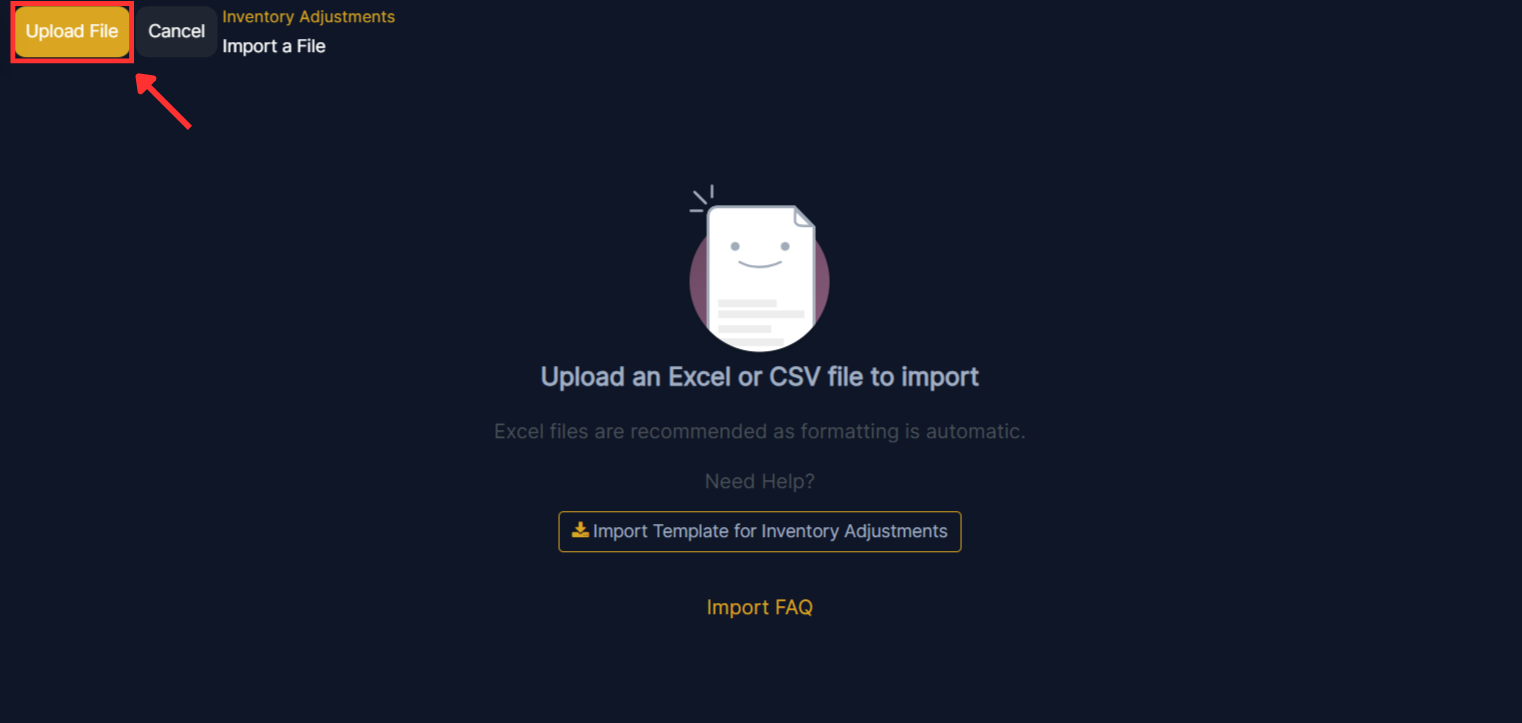
Then, a pop-up window appears, in which the completed inventory adjustment template spreadsheet file should be selected and uploaded to Edgerp.
After that, Edgerp reveals a page showcasing all the elements of the newly-configured inventory adjustment template spreadsheet, separated by File Column, Edgerp Field, and Comments.
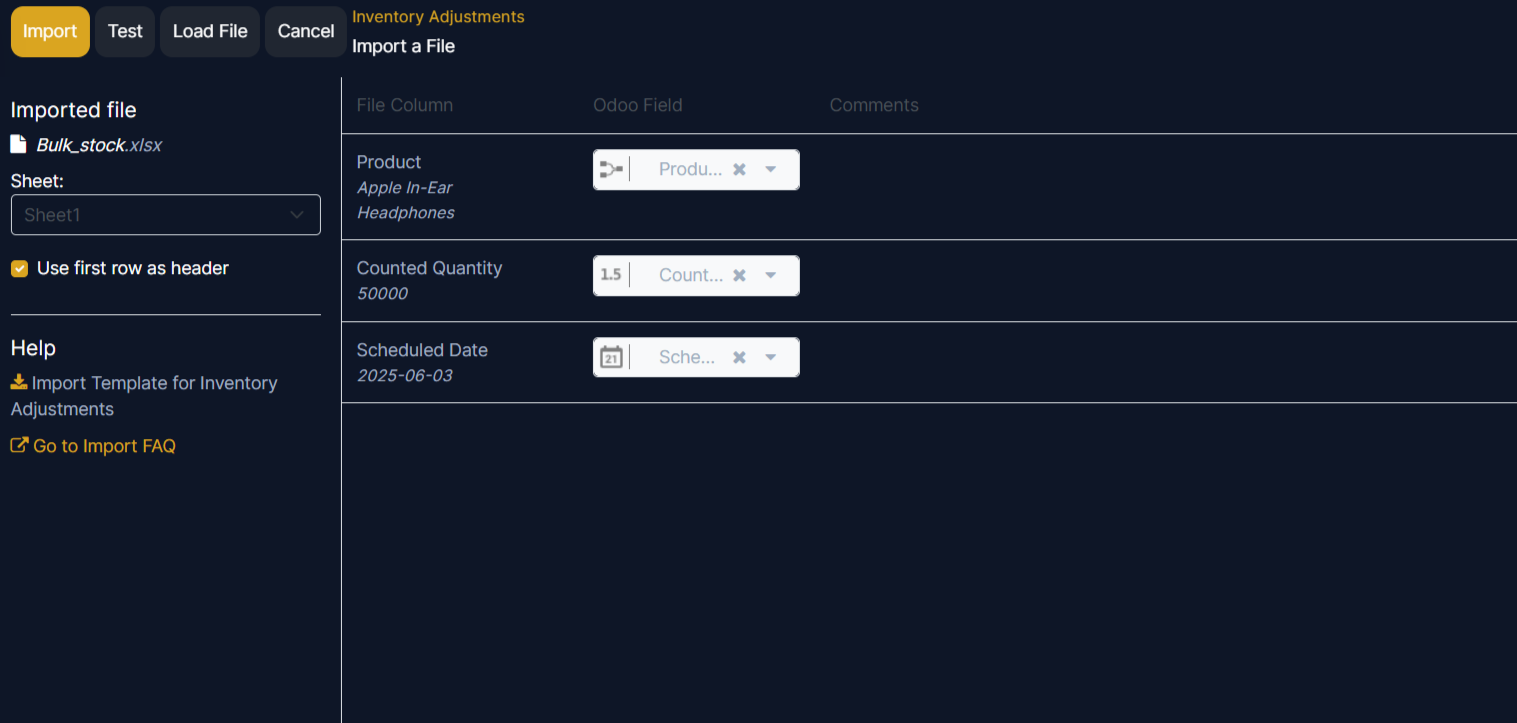
From here, the File Column can be manually assigned to an Edgerp Field, if necessary.
To make sure everything is appropriate, and all the columns and fields are lined up accurately, click the Test button in the upper-left corner.
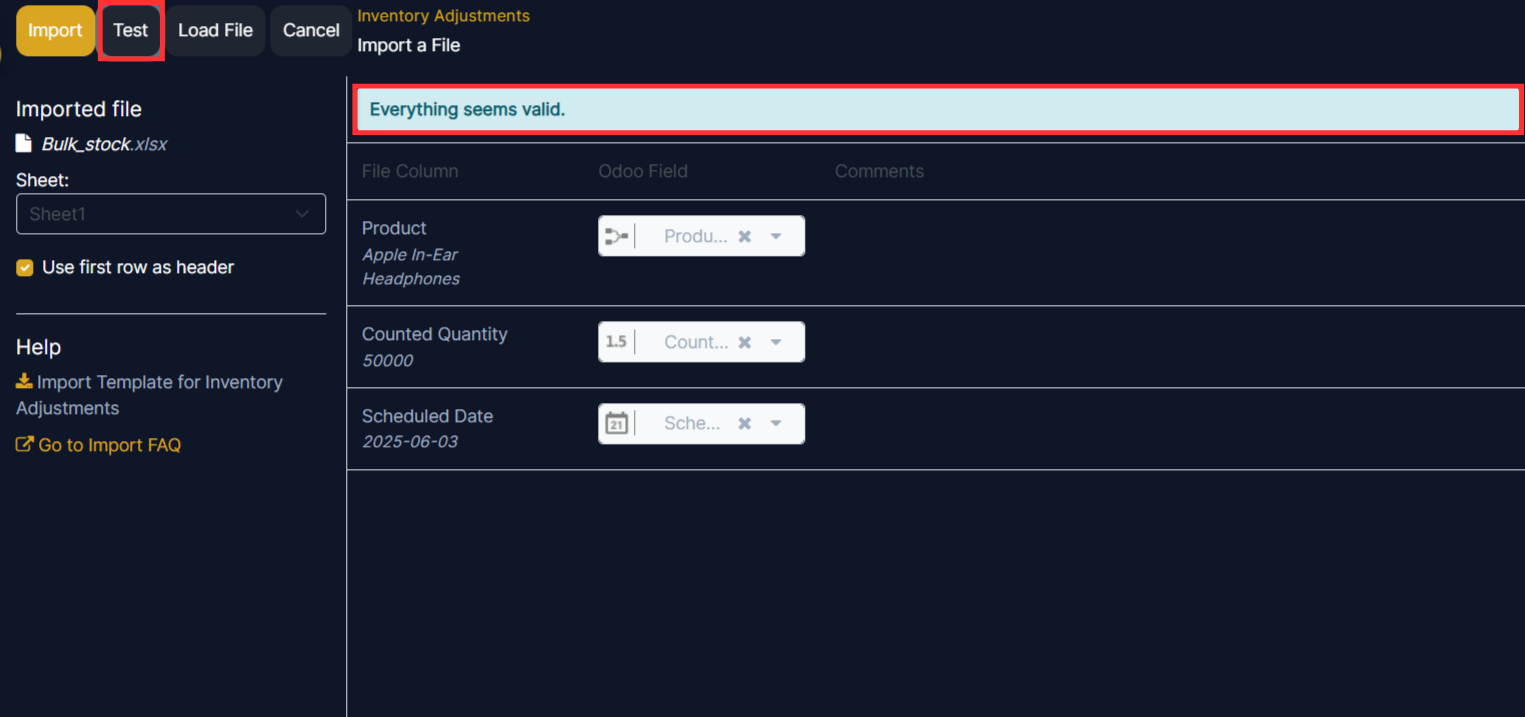
If everything is lined up and applied correctly, Edgerp reveals a blue banner at the top of the page, informing the user that Everything seems valid.
If there are any errors, Edgerp reveals a red banner at the top of the page, with instructions of where to locate the specific issues, and how to fix them.
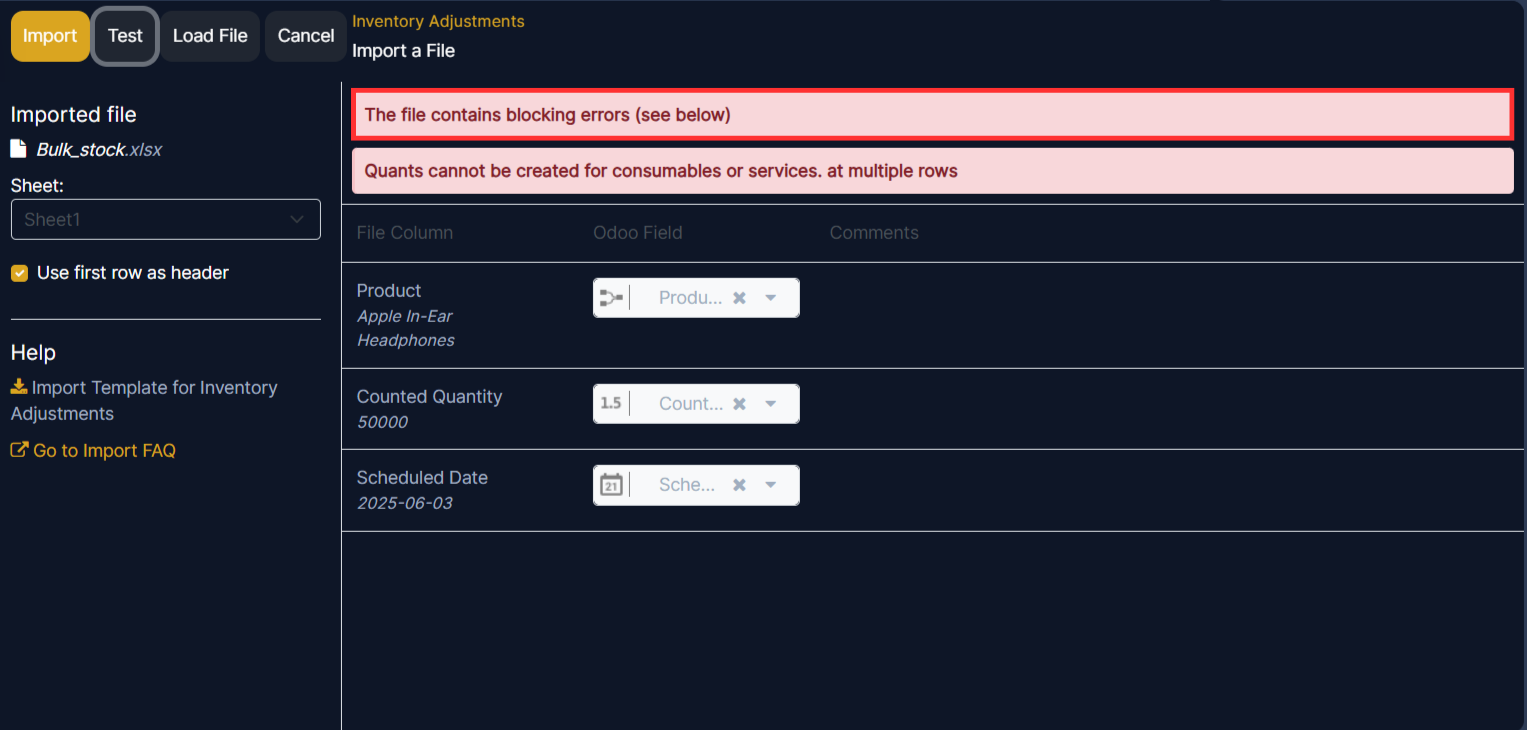
Once those errors are fixed, click Test again to ensure all necessary issues have been remedied appropriately.
If additional product template spreadsheets need to be uploaded, click the Load File button, select the desired product template spreadsheet, and repeat the process.
When everything is ready, click the Import button.
When clicked, Edgerp instantly imports those inventory adjustments, and reveals the main Inventory Adjustment page, with a pop-up message in the upper-right corner. This pop-up message informs the user how many products were successfully imported.

At this stage, the count (inventory adjustment) is recorded, but not yet applied. This means that the quantity on hand before the adjustment has not yet been updated to match the new, real counted quantity.
Apply adjusted count
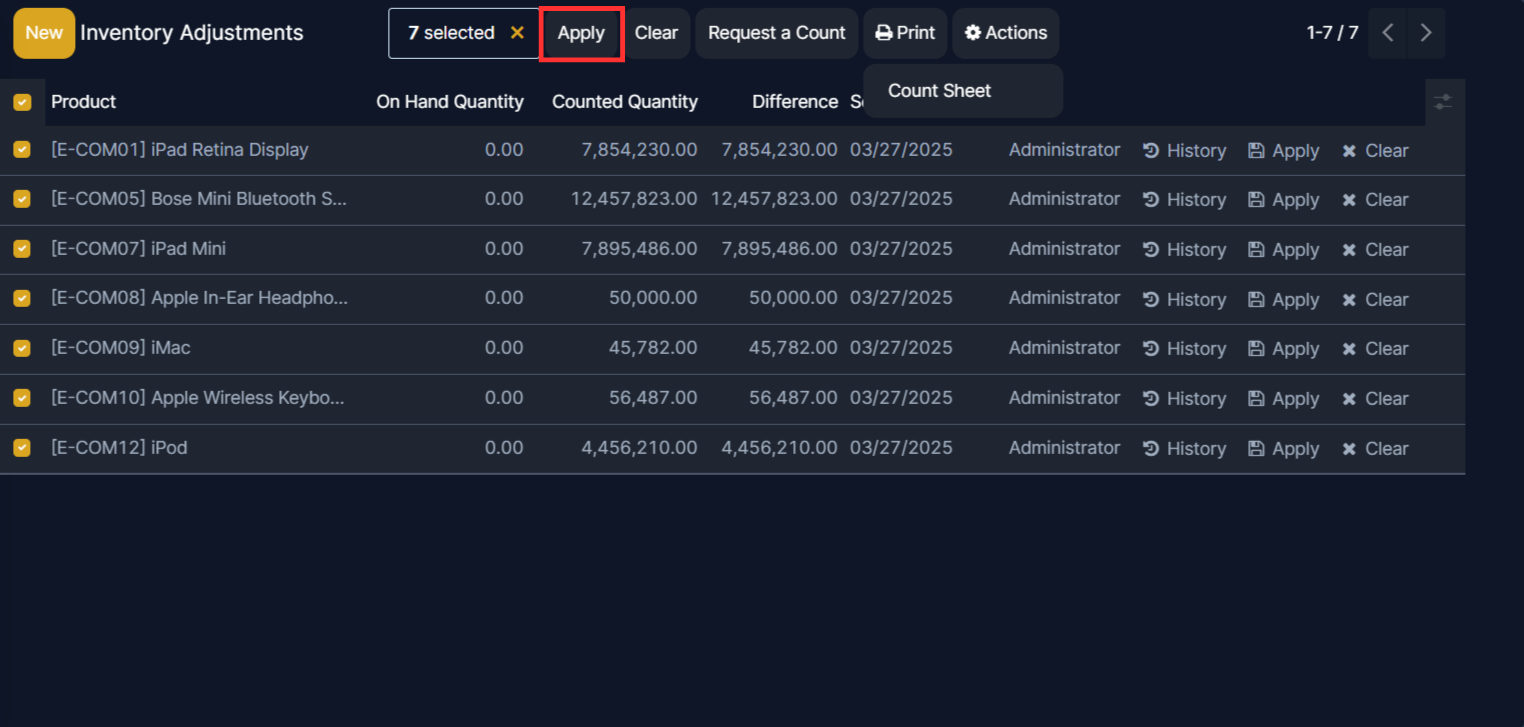
Inventory adjustments can be completed in several ways. The first way is to click the Apply button on the line at the far right of the page. The second way is to tick the checkbox on the far left of the line. Doing so reveals new button options at the top of the page, one of which is an Apply button. Clicking this button instead causes an Inventory Adjustment pop-up window to appear.
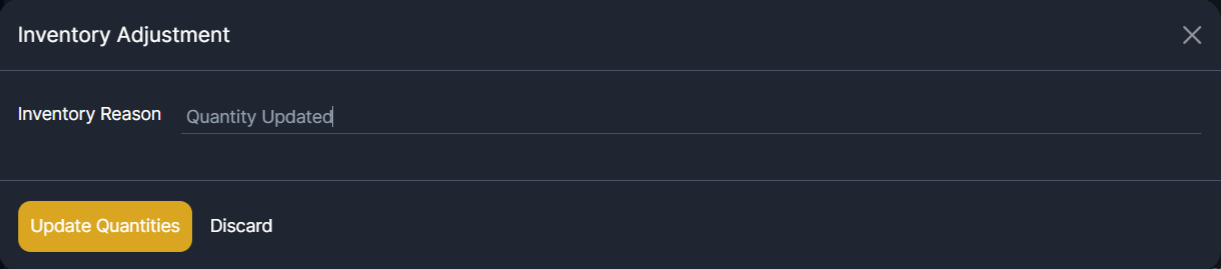
From this pop-up menu, a reference or reason can be assigned to the inventory adjustment. By default, the Inventory Reason field is pre-populated with today’s date, the date the adjustment is being made on, but can be changed to reflect whatever reference or reason is desired.
Once ready, click Apply to apply the inventory adjustment.
After clicking on apply it will show and pop up where you can add your reason to update the inventory so you can write any of your reasons there.
After all these steps you can see that the On Hand Quantity is changed and updated as per your file.

Set to zero
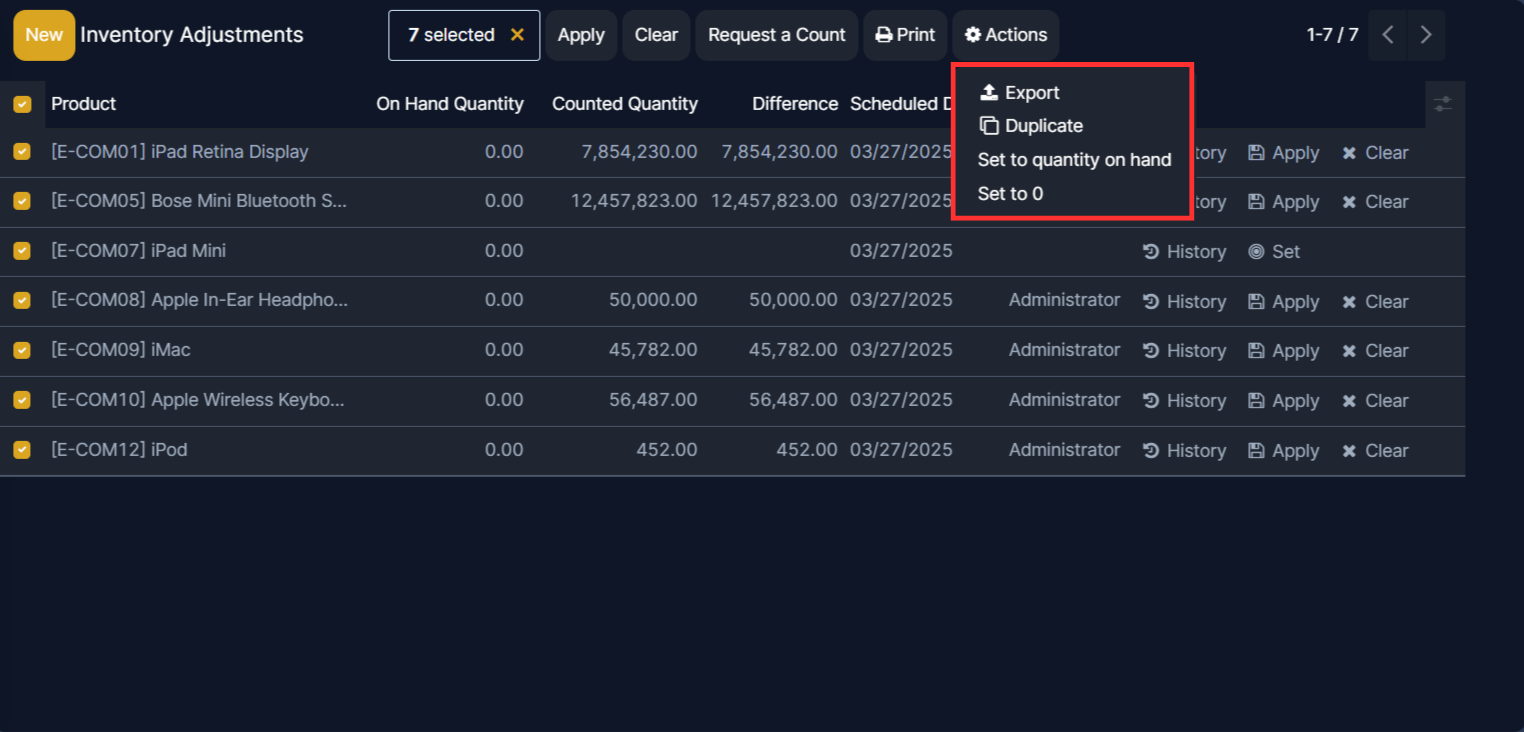
Inventory adjustments can also be used to clear inventory counts by setting the quantity to zero. To do this, tick the checkbox at the far left of the line for the desired product. At the top of the page, click the Actions button to open a drop-down menu. Click Set to 0. Once this is complete, apply the adjusted count.
Count products
Counting products is a recurring activity in a warehouse. Once a count is complete, go to Inventory app ‣ Operations ‣ Physical Inventory to update the Counted Quantity column for each product line.
The Actions menu appears when one or more products’ checkboxes are selected. The Actions menu includes the option to Set to quantity on hand, which sets the selected products’ Counted Quantity to the On Hand Quantity, and Set to 0, which sets the selected products’ Counted Quantity to zero.