This guide explains how to use the Time Off module in Edge ERP to request, view, and manage your time off. This module helps you easily submit leave requests, track your available time off balances, and stay informed about your team's absences.
1. Time off types
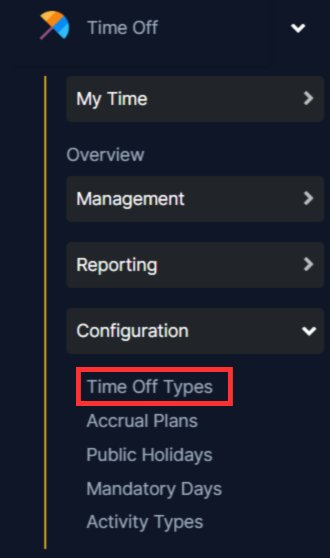
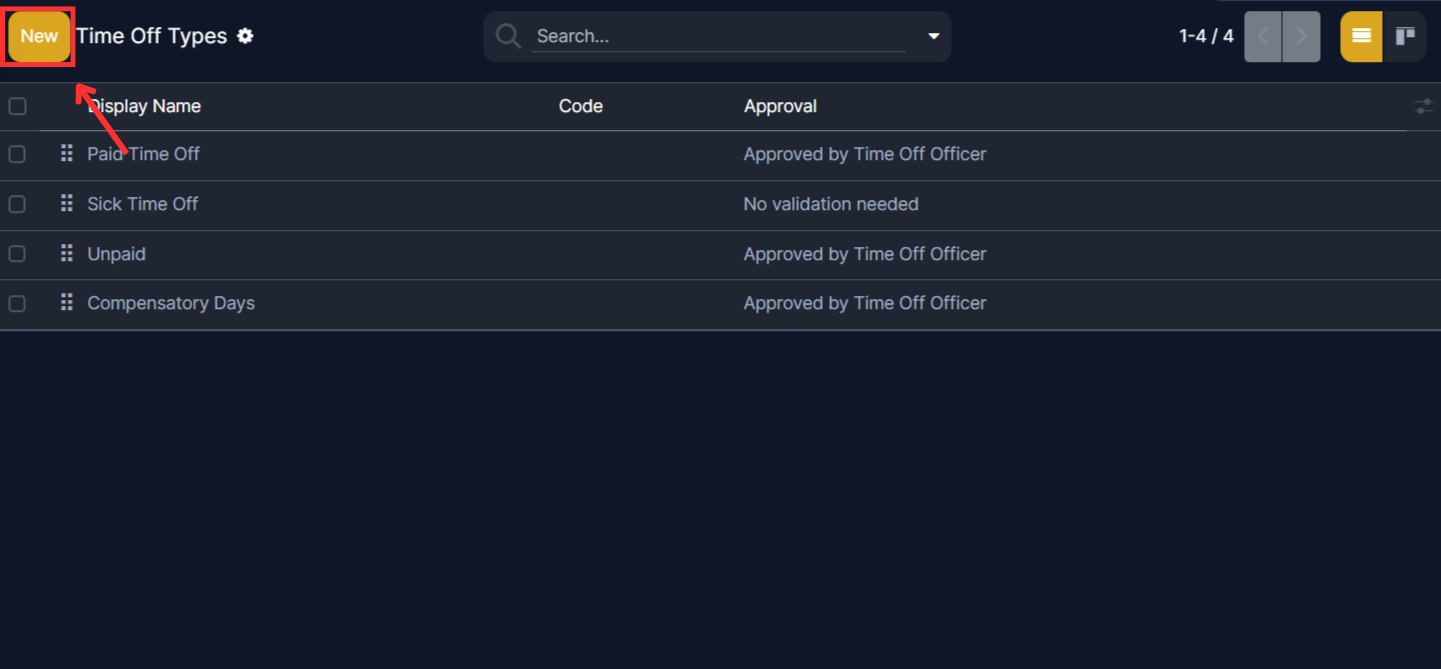
To view the currently configured time off types, navigate to Time Off app ‣ Configuration ‣ Time Off Types. The time off types are presented in a list view.
The Time Off app comes with four preconfigured time off types: Paid Time Off, Sick Time Off, Unpaid, and Compensatory Days. These can be modified to suit business needs, or used as-is.
Create time off type
To create a new time off type, navigate to Time Off app ‣ Configuration ‣ Time Off Types. From here, click the New button to reveal a blank time off type form.
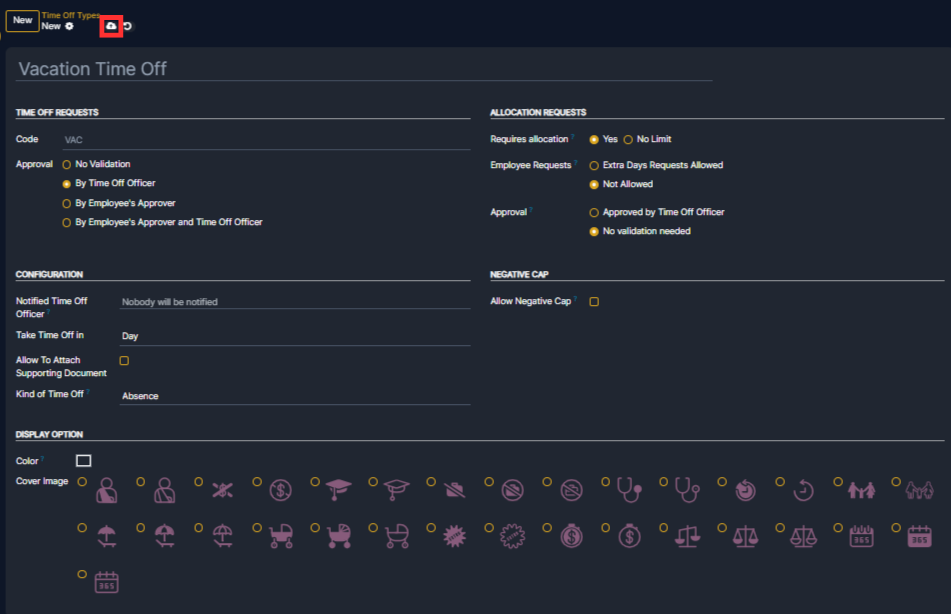
Enter the name for the particular type of time off in the blank line at the top of the form, such as Sick Time or Vacation. Then, enter the following information on the form.
- Code: A unique identifier for this time off type.
- Approval: This defines how the leave request is approved.
- Requires allocation: Specifies whether employees need allocated days to request this leave.
- Employee Requests: Controls if employees can request more days than allocated.
- Approval (for extra requests): Sets the approval method for additional day requests.
- Notified Time Off Officer: The person who gets notified of new requests.
- Take Time Off in: Specifies how leave is measured.
- Allow Negative Cap: Allows or prevents negative leave balance.
- Display Option: An icon for your vacation
After filling out the form you need to save this time off. For that click on the save button on the top left corner.
2. Public holidays
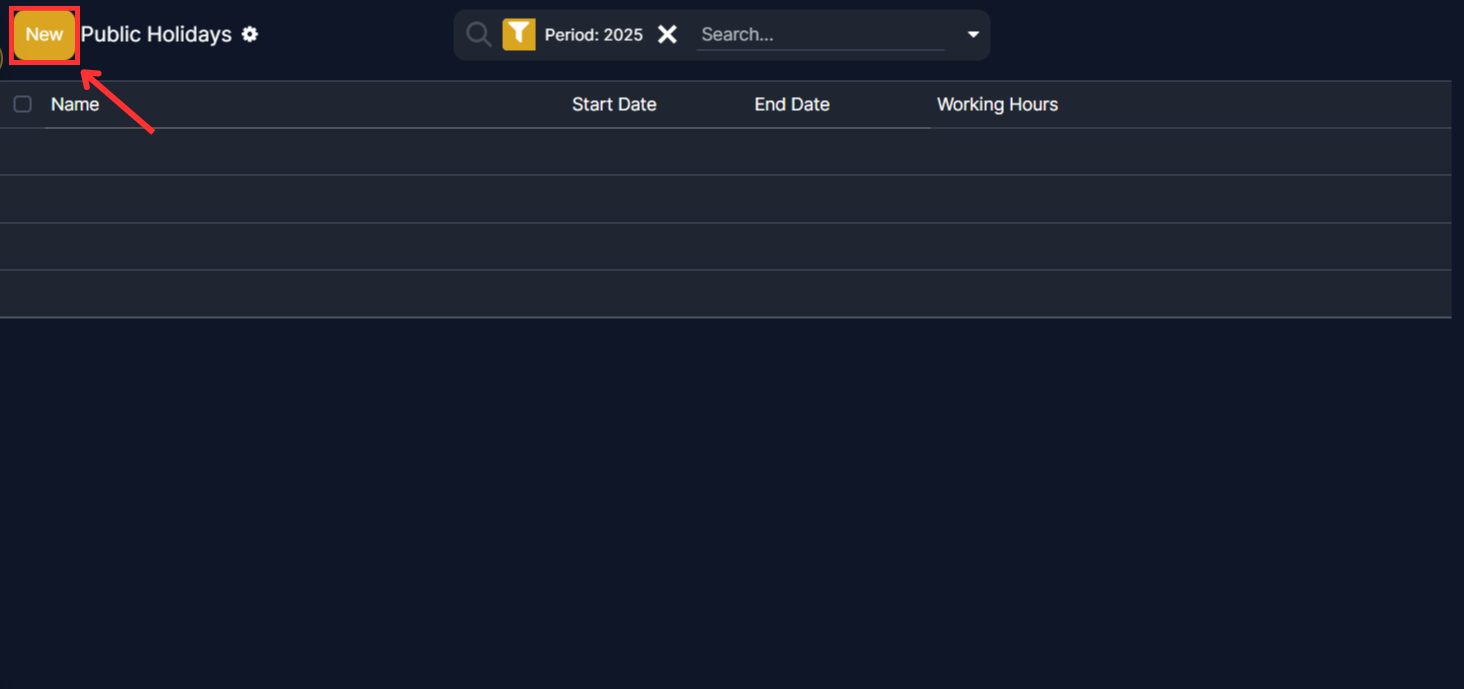
To observe public or national holidays, and provide extra days off as holidays to employees, configure the observed public holidays in Edgerp. To create a public holiday, navigate to Time Off app ‣ Configuration ‣ Public Holidays. All currently configured public holidays appear in a list view.

Create public holiday
Click the New button, and a new line appears at the bottom of the list.
Then you have to fill the details for the public holiday like:
- Name: Enter the name of the holiday.
- Start Date: Select the holiday start date and time using the picker.
- End Date: Select the holiday end date and time using the picker.
- Working Hours: Select a specific working schedule if the holiday should apply only to certain employees, or just leave blank to apply the holiday to all employees.
After filling out the details now it is time to save this. So click on the save button on the top left corner of the page.

